Monday, January 27, 2014

Re-Routing...

Short update today!

I got around to routing out the wire passage between the pickup cavity and the switch cavity today!


Unfortunately, there was a little weirdness happening on one side of the cut, probably due to the template guide slipping off the template, but fortunately this part will be covered by the pickguard, so it won't even be noticeable.

Thursday, January 9, 2014

I'm Sick of Waiting!


        So, as you can see, it has been a long time since I worked on my guitar. I never seemed to have any time (with college apps and all). But it was time to strip the strings off of the guitar and begin working. I finally decided (with the help of a friend) that I just need to work a little bit per day. Just make it my daily routine to get home from school, go downstairs and work on the guitar to unwind, and then do my homework. Simple. So here's what I did on Monday and today.


I sanded the cavities down with a dremel tool to get the pesky flakes off. The flakes were quite large, which is why I went for the dremel tool first before hand sanding.


I need to make an additional passageway for wires behind where the pickguard will be, so today I made another router template.


The wires need to be able to go from the pickup cavity to the switch cavity.


So, the template will lay over the body something like this to allow the router to cut a passageway.

I truly am sorry (both for myself and for everyone who is eager to see a finished product) for not finishing this guitar earlier. I hope you all will enjoy an update every day or so that documents the small progress I make each day.

Finally...

Heh, putting strings on a guitar has an odd effect to it. I ended up wanting to play the unfinished guitar a lot more than I actually wanted to finish it. And that happened for about a month. But today, I finally set back down to work again. After a month of playing, I decided that even with the recessed bridge posts, the action was still too high.

Sorry. I had to.

So, I decided to recess the bridge into the body. Eh, not the typical thing to do with tune-o-matic bridges, but it has to be done to get the guitar to be playable. It wasn't until I researched Gibson style guitars that I realized what I was getting myself into using a tune-o-matic bridge with a fender neck. Here are a few pics from stewmac.com that explains it better than I ever could.


Fender

Gibson

So the bridge design is higher on a Gibson than a Fender. Huh. Well, that means I need to lower the bridge into the body. So, I dismounted the neck (again) and pulled out the bridge hardware.


I started out by making a template to route out the body so that the bridge would fit.


Then I routed the cavity out.

Then I re-seated the bridge. Easy as pie!

Wednesday, September 11, 2013

Hardware! YAY!

Ugh, I have to get out of the habit of posting my work several days after I actually do it. Anyways, I was able to fix the problem with my guitar's bridge not fitting. Here's what I did:


 Some sawing and a cut later...


I sanded the post down so that it was flush with the body.


I then re-drilled the hole for the bridge hardware, and as you can see, the new hole is a little bit off of where the old hole was.


I re-installed the hardware, and played the guitar for a bit. I noticed that the action was a bit high. I couldn't do anything about it, though, because the bridge was already in its lowest position. Apparently tune-o-matic bridges are not meant to work with fender necks. To bring the strings closer to the fret board, I decided to drill some recesses in the body so that the bridge would sit down lower.


I pulled the hardware... again. I sanded down some more dowels and covered them in tape to keep them from spinning inside the holes. I proceeded to make recesses about 3/16" deep. I then reinstalled the hardware, but I forgot to take a photograph, so I'll update this post once I have another photo of the guitar.

Saturday, September 7, 2013

You take a step forward, you take a step back.

Ok, so I got lazy. So here's two days of work in one post.

I took the body to my dad's work to sand the edges down to a smoother texture in prep for the final hand sanding.


This is an oscillating spindle sander. As the spindle rotates, it moves up and down to create a perfectly even sanding job. I had to move quickly around the body, or else the spindle would create divots in the body.


Then, I took the body home and started the belly cut. I clamped the body to the table so it wouldn't move.


Using the belt sander (upper left) to take most of the material away, I progressed to using a file to take more material away in a less abrasive manner. Then, I moved to sand paper to give the result you see above.


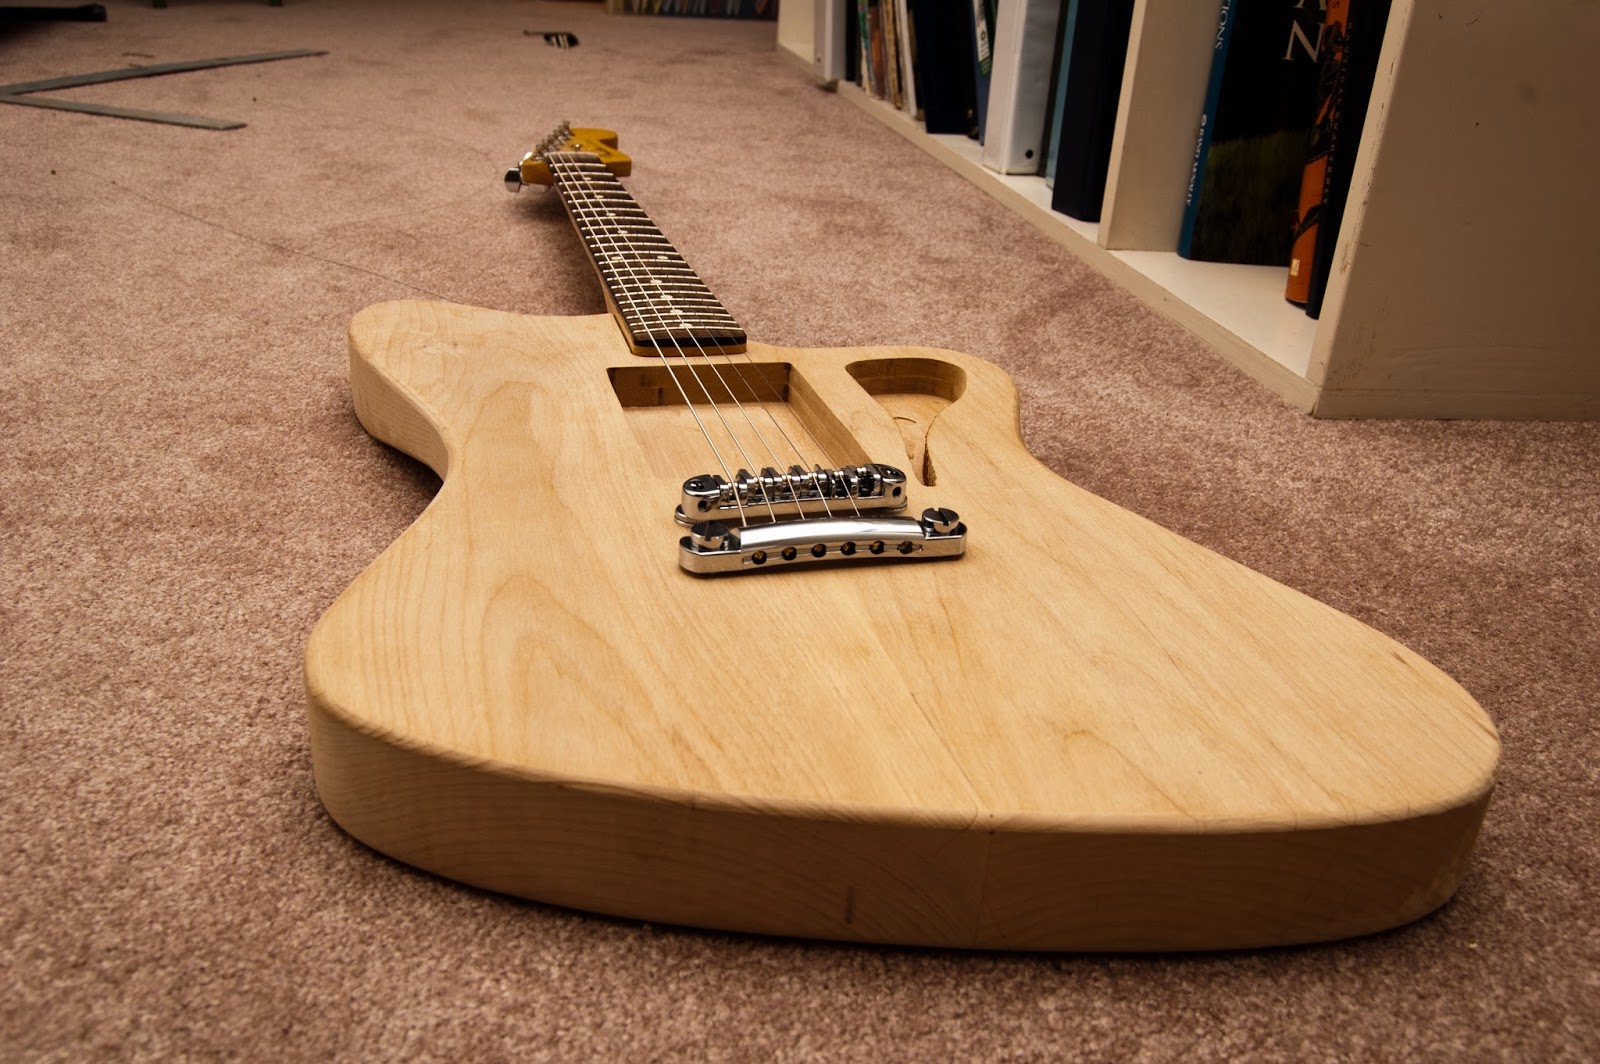
Today, I went about installing some hardware. I used some masking tape to make some markings.


I carefully drilled some holes for the tailpiece. It wasn't a very exact science, as I used a brad point drill bit as a transfer punch to mark where the holes went.


This hardware fit just fine.


And so did the tailpiece.


A very exciting part of the whole process was putting some strings on the guitar in order to place the bridge in the right spot. For the first time, I was able to PLAY the guitar! It had a bit a of bark to it, similar sounding to a Gibson SG without an amp.


Then, the disaster happened when I drilled the hole for the bridge. I drilled the holes ever so slightly too close to each other, and the bridge refused to fit onto the body. So, I pulled the hardware out of the hole I drilled (harder to pull than a dentist pulling a tooth).


So, I cut a dowel and filled the hole. Next, I plan to saw off the top of the dowel and sand it flush with the body. Then, I'll re-drill the hole so that the bridge fits. Not the best way to learn how critical hole placement on a guitar is, but at least the hardware will cover up the mistake, not to mention the paint that is to come.

Tuesday, September 3, 2013

Silky Smooth...

Disclaimer:

So, as the school year starts to roll in, I'm not going to have as much time to work on my guitar. That doesn't mean, however, that I won't be working on the guitar at all. So, expect some shorter posts from now on, like this one.

Whew! Now that that is taken care of, let's see what I did today.


 Today, I routed out the edges of the guitar's body with a round off bit. It has a 1/4" radius, meaning that the arc formed by the bit has a 1/4" radius. While the body rides along the bearing, the bit nibbles away at the corner of the body. I used the table mount for the router because it made it easier to get a square cut. I had to move the body around the bit quickly to avoid any burn marks.


The body is really starting to look nice now! With that smooth edge, the guitar feels very smooth to the touch. I sanded for a bit, and then realized that I had not sanded the edges of the guitar yet (which will take care of those nasty burn marks). So, I'll have to take care of that, and then see whether I need to route the edges again or if just sanding the edges will be acceptable.

Dat neck...

So, I routed out the neck slot, and fitted the neck yesterday! Here's what I did:


The neck slot isn't just any old part of the guitar that you can route and not care about how it comes out because you have a pick guard to cover it up; it's an essential piece that holds the neck in place and makes sure that the guitar doesn't snap in two when there is string tension on. So, to get the router to precisely cut the slot, I fabricated a jig that would support both sides of the router when cutting to ensure a clean, even cut. Since the router is a bit low tech and only locks the height adjustment on one side, I had to be sure not to put too much pressure on the non-locking side (putting too much pressure on would cause the bit to tilt and cut too deep).


This is what the fitting looked like after the routing was complete. Looks pretty good, huh? Wrong. The neck wasn't even close to fitting. Still, I was pleased that the surface that the neck attaches to was nice and flat.


A few hours, a lot of sanding and a little chiseling later, the neck finally fit. I was able to bolt it on using the correct size screws, and voila! A guitar appeared before my eyes. I can see it now.... just a little more shaping, and the body will be complete!